Create a label template
- In ION, go to Settings > Organization > Barcode Labels.
- In the Label templates section, select the tab for the entity type you want to configure: Inventory, Kits, Locations, or Runs.
- Click New Template.
- Fill in the template fields:
- Click Create Template.
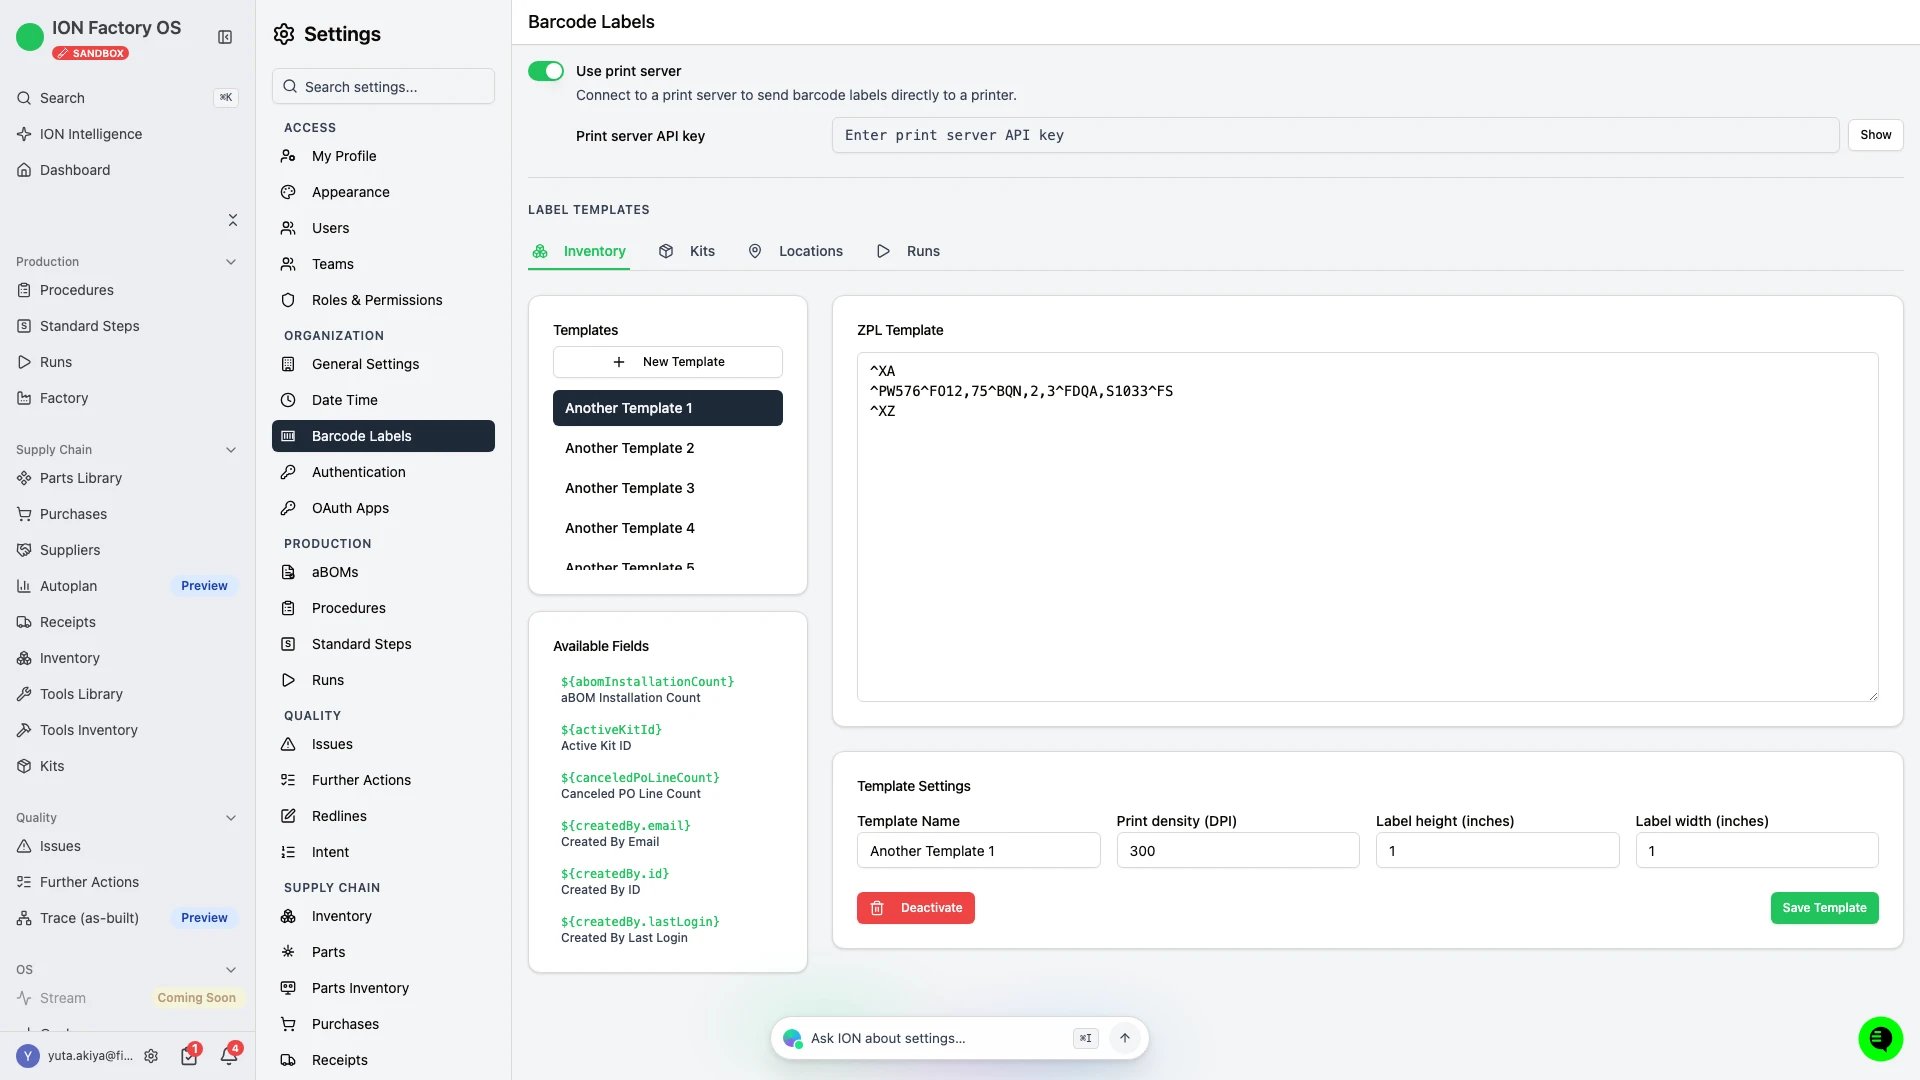
The Barcode Labels editor with a ZPL template, its available fields, and the template settings.
Edit a label template
- In ION, go to Settings > Organization > Barcode Labels.
- Select the tab for the entity type, then select the template you want to edit from the Templates list.
- Update the template fields.
- Click Save Template.
Available template variables
Insert variables into your ZPL template, and ION replaces them with the record’s data when it prints. A variable is a field of the record in camelCase, such as${serialNumber}. A field of a related record is nested under that record, such as ${part.partNumber}. The Available Fields panel in the template editor lists every variable for the template’s entity type.
Common variables on an inventory template:
Set the default print order
When an operator prints labels for several records at once, this setting decides which label comes off the printer first.- In ION, go to Settings > Organization > Barcode Labels.
- In the Print order section, set Default order for bulk prints to As listed or Reversed. As listed prints the records in the order they’re listed, which for a table is its current sort, and Reversed prints them back to front.

The Print order section of the Barcode Labels settings.
Connect a print server
A print server lets ION send barcode labels directly to a printer without requiring a browser print dialog.- In ION, go to Settings > Organization > Barcode Labels.
- Turn on Use print server.
- In the Print server API key field, enter the API key for your print server.