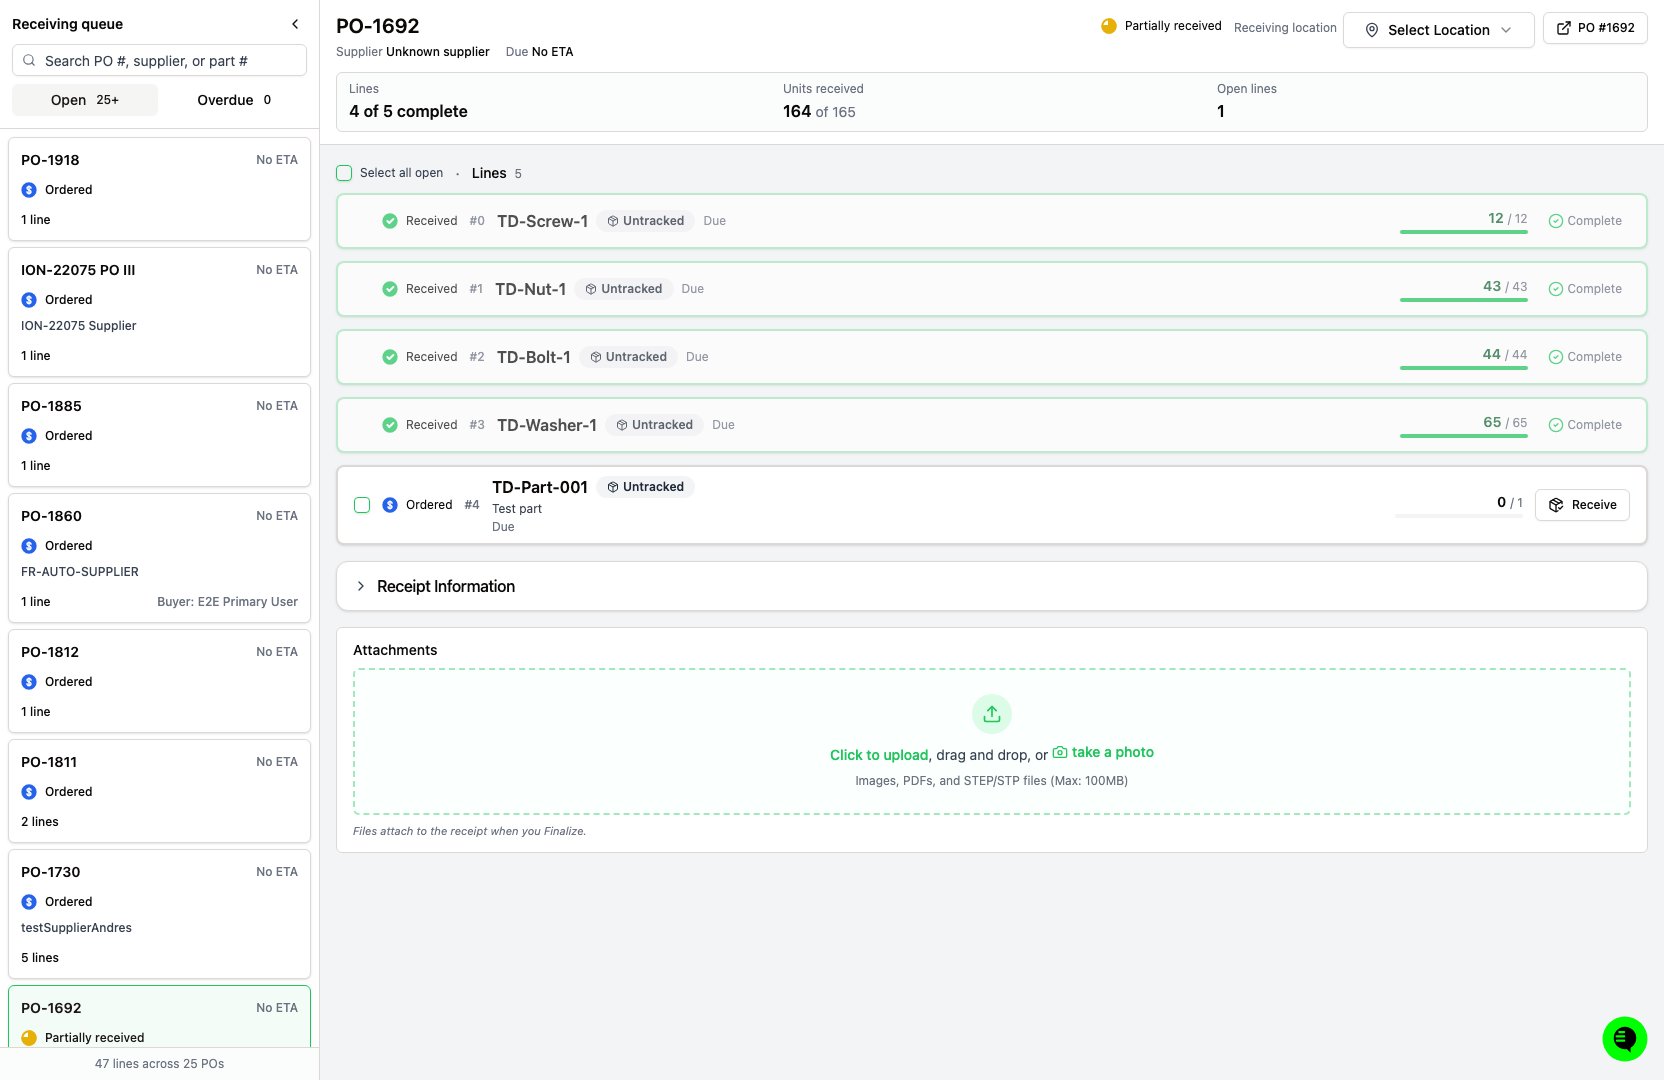
The receiving workspace with a purchase order selected: the receiving queue, the Receiving location control, and each line's progress.
Receive against a purchase order
A line joins the receipt you’re building the moment you open it, and one Finalize receipt commits every line at once.- Open a purchase order in Ordered status and click Receive.
- Optional: set the Receiving location at the top of the PO to put every line away in the same place. You can override it on an individual line.
- Click Receive on a line and, for each unit, specify the following:
- Serial number, if the part is serial tracked.
- Lot number, if the part is lot tracked.
- Location, unless the receiving location already applies.
- Click Receive on the next line in the shipment. A line still missing details stays open and shows Needs details.
- Click Finalize receipt to create one receipt covering every line you added.
Depending on your settings, each lot the receipt receives merges into identical stock already at its location when you finalize. See Merge inventory.
Track and adjust the receipt before finalizing
A bar at the bottom of the page summarizes what the receipt holds so far: N lines ready with a unit total, or N lines need attention when a line is still incomplete. Each line appears in the bar as a chip.- To reopen a line, click the edit control on its chip or Edit on the line.
- To take a line back off the receipt, click the remove control on its chip or on the line.
- To abandon the whole receipt, click Discard.
Receive several lines at once
Select the lines you want with their checkboxes, or click Select all open, then use the toolbar above the lines:- Receive N lines opens every selected line at once.
- Update N lines applies one field across the selection: a location lands on every selected line, and a lot number lands on the lot-tracked ones. Either action adds those lines to the receipt, so they flow into the same Finalize receipt.
Flag a problem while receiving
If a unit arrives damaged or non-conforming, click Report on that unit to open an issue against it. The unit then shows the linked issue. See Create an issue.Add attachments and receipt details
Before finalizing, you can attach files to the receipt, such as a packing slip or a certificate, and fill in any receipt custom attributes your org defines. Both sit below the PO’s lines.Receive non-part purchases
You can also receive purchases that have no part, such as services. The flow is the same, except the inventory fields (serial, lot, location) don’t appear, because there’s nothing physical to track. See Purchase types.Find a receipt
To find a receipt for a PO, type the PO number in the search box on the Receipts page.Edit a receipt after finalizing
A finalized receipt’s custom attributes and attachments stay editable on the Receipts page. The received serials, lots, and locations don’t change here.- On the Receipts page, open the receipt.
- To change a value, edit the receipt custom attributes in the receipt’s detail pane. To attach a file, use the attachments area in the same pane.
- To set the same attribute value on several receipts at once, select them on the Receipts page and click Change Attributes.
Comment on a receipt
A Comments card in the receipt’s detail pane holds a discussion thread for the whole receipt.- On the Receipts page, open the receipt.
- In the Comments card, write your note in the Add a comment on this receipt… field. You can format the text and
@-mention a user to notify them directly. - Click Comment.
Act on a received unit
You can work on the inventory a receipt created without leaving the receipt. On the receipt’s unit table, in both the By PO line and All units views, each unit row has an Inventory actions menu:- Split breaks the unit into separate inventory records. See Split inventory.
- Move puts the unit away in a different location.
- Adjust sets a new total quantity, scraps part of the unit, and records a reason for the adjustment.
- History shows the unit’s audit trail.
Split isn’t available on a serial-tracked unit, since a serial number
identifies a single unit.