Create a location
- On the Factory page, click Create Location.
- Enter a Name (required). Optionally fill in Description, Address, Image, Geolocation Latitude, and Geolocation Longitude.
- Choose a Type: Warehouse, Rack, Shelf, Tote, or Workcenter.
- Optionally pick a Supervisor and a Parent Location.
- Set the inventory switches: Inventory Available (whether stock here counts as available), Can Hold Inventory (whether inventory can go here), Pickable (whether kitting can pull from here), and Exclude from Inventory Merge (whether stock here auto-merges). For what each one does, see the locations overview.
- Click Create Location.
Organize locations into a hierarchy
Set a location’s place in the tree with the Parent Location field, either when you create it or later from its detail page. To add a child under an existing location, open that location and use the Create Location button in its Sub Locations card. The new location’s parent is filled in for you.Set the pick order
The pick order is the sequence a picker walks your bins in. Every surface that shows a walk follows it: the stops on a pick run, the pick list on the Kitting page, and a kit’s lines on the phone. Ordering is within a level: which area first, then which aisle inside it. A location with no order falls to the bottom of its level and is visited in name order.- On the Factory page, click Edit pick order.
- On the Pick order page, drag the locations into the order a picker walks them.
- Click a location to open it and order what is inside. Each level loads when you open it, so a deep tree stays workable.
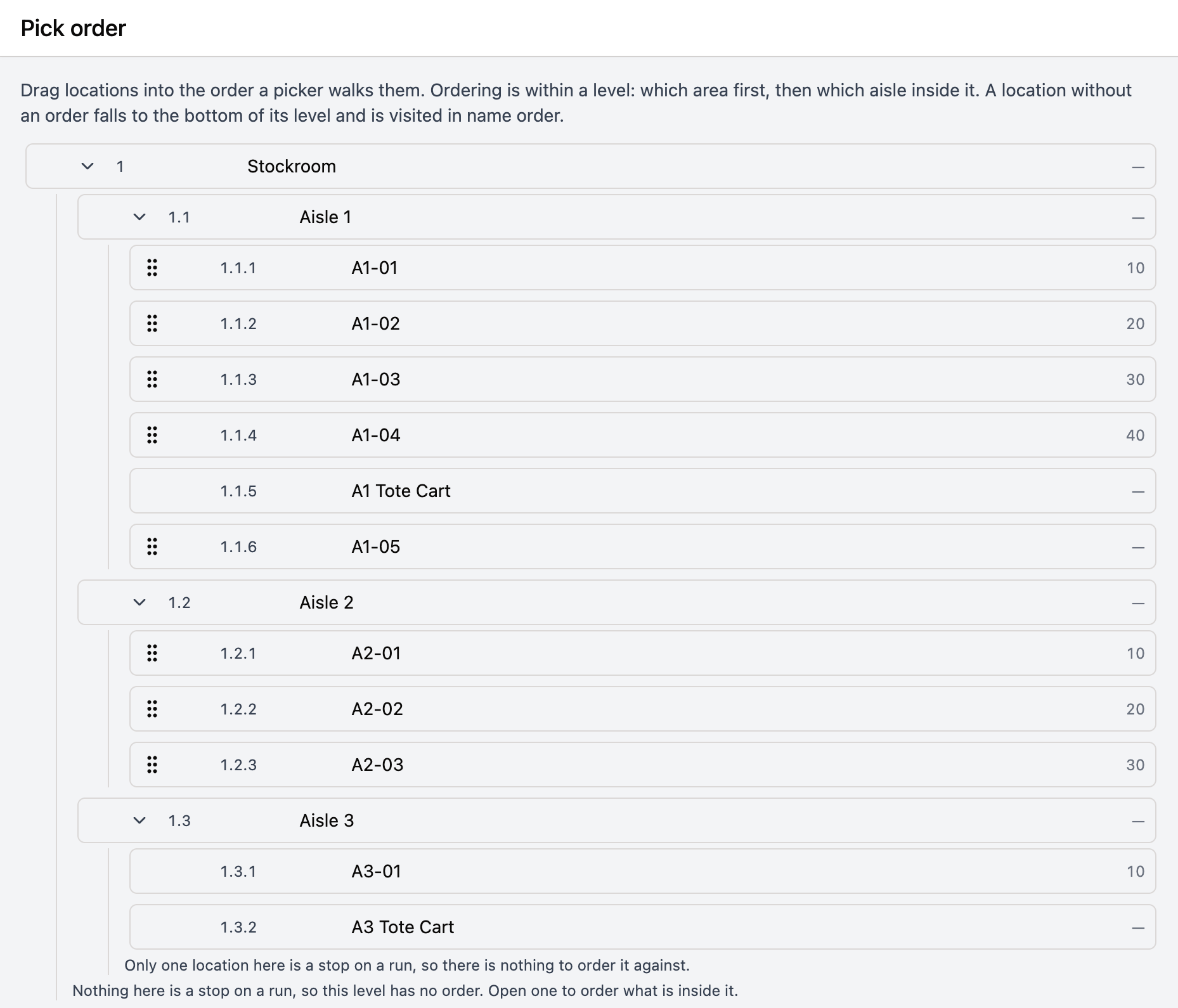
A site opened two levels deep. The left number is the row's position in the tree; the right number is its stored pick order. The tote carts are containers, so they show a dash and have no drag handle.
1.2.3, is the row’s position in the tree. ION reads it from the tree, so you can’t type it. The one on the right is the stored pick order, the same value the Pick order column shows on the Factory table.
Only Pickable locations are stops, so only they have a drag handle and a pick order. Any other location shows a dash on the right. It’s a container: you can open it and order what’s inside, but you can’t drag it against its siblings. A container with no pick order is walked in name order among its siblings, and numbers in names sort as numbers, so Aisle 2 comes before Aisle 10. Archived locations don’t appear on the page at all.
When you drop a row, ION renumbers the whole walk to match, not just the level you changed. That keeps each area’s contents together, so moving an area moves everything inside it.
A level that can’t be ordered says why:
- Nothing here is a stop on a run, so this level has no order. Open one to order what is inside it.
- Only one location here is a stop on a run, so there is nothing to order it against.
- On a level with more locations than the page loads at once, it says so and points you at the Pick order column instead.
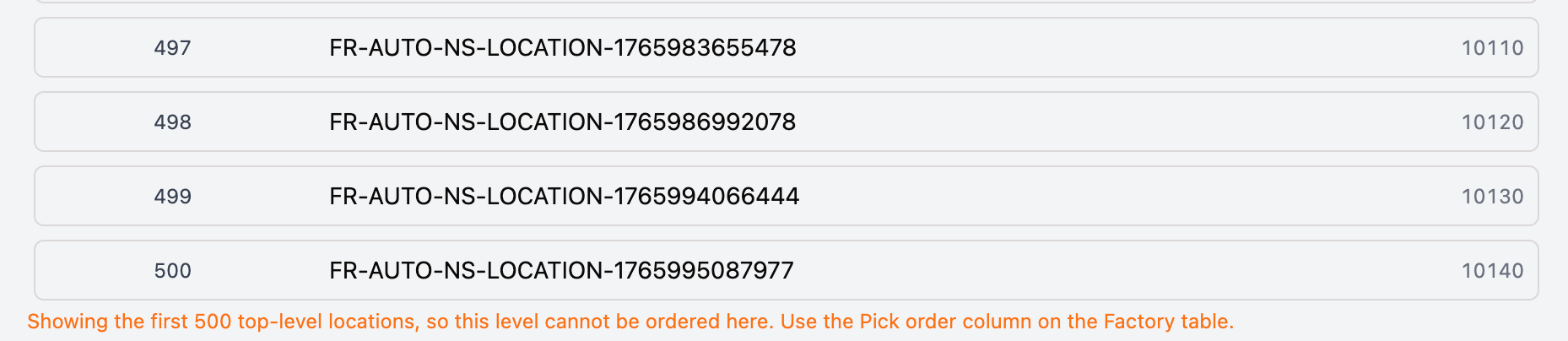
A top level with more locations than the page loads says so, and points you at the Pick order column.
If the Factory table doesn’t show a Pick order column, it’s turned off in your saved column layout. Open Manage Columns and switch on Pick order. The layout is saved per browser.
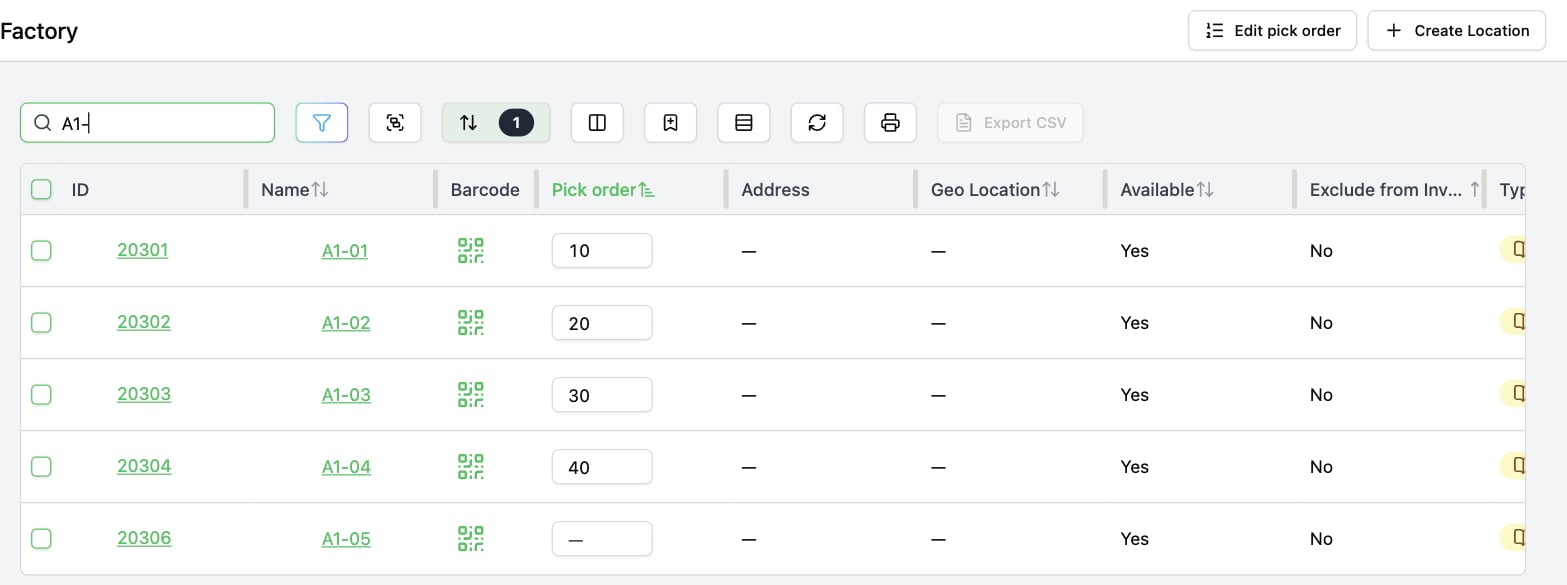
The Factory table sorted by Pick order. Each pickable bin has an editable cell, and the sort reads the floor back in walk order.
Pick order runs across the whole site rather than per aisle. Numbering each aisle
10, 20, 30 on its own produces an order that reads as if the aisles interleave, because every aisle repeats the same numbers.A kit line filled from more than one bin walks at the earliest of them, which is the first point a picker can act on it.
Edit a location
Open a location from the Factory page to reach its detail page. Fields in the Location Information card are editable in place and save automatically as you change them. Can Hold Inventory and Pickable are advisory until your organization turns on the matching enforcement setting. Depending on your settings, ION can reject inventory bound for a location that isn’t marked Can Hold Inventory, and keep inventory at a location that isn’t marked Pickable out of kitting. For more information, see Configure location constraints.When your organization enforces can-hold-inventory, you can’t turn off Can Hold Inventory on a location that still holds inventory. Move the inventory out first.
Archive or delete a location
On a location’s detail page, open the Location actions menu (the … menu):- Archive Location hides the location from active use without removing its history. Use Unarchive Location to restore it.
- Delete Location removes the location permanently. Deletion requires the
DeleteLocationpermission and can’t be undone. You can’t delete a location that’s set as your organization’s default bill-to or ship-to in the purchase order settings.