Add a step
- While editing a procedure, click Add Step at the bottom of the steps list, or hover over an existing step and use its … actions menu to Add step below or Add child step. The Add Step dialog opens on the Create New tab.
- Enter the Step Name and choose the Step Type, Content or Datagrid. Optionally set a Location and toggle Outside Processing Step.
- Click Create Step.
Create a step from a PDF
You can turn a PDF into procedure steps instead of authoring them by hand.- While editing a procedure, click Add Step to open the Add Step dialog on the Create New tab.
- Set Step Type to PDF.
- Upload the PDF, then enter the pages to use in the Pages field, such as
1,2,3-5. - Enter a Step Name, then click Create Step.
Configure the step
Configure the step based on the type you chose.- Content
- Datagrid
Content steps hold written instructions. The content box supports text formatting: colors, lists, fonts, pictures, and tables.To put a picture inside the text, place your cursor where the picture goes, then click Image in the content box’s toolbar and choose the file. You can also type
/ and select Image. To use a picture from a link instead of a file, open the Image button’s menu and click Insert via URL.To add a table, build it in Google Sheets and paste it in. Pasting from Excel copies the content but not the formatting.
Attachments
Attach reference files to a step from the Attachments panel. Click Browse files to upload a file, or Take a photo to capture one. A STEP file (3D CAD model) can be previewed in place, so an operator can inspect the model without downloading it.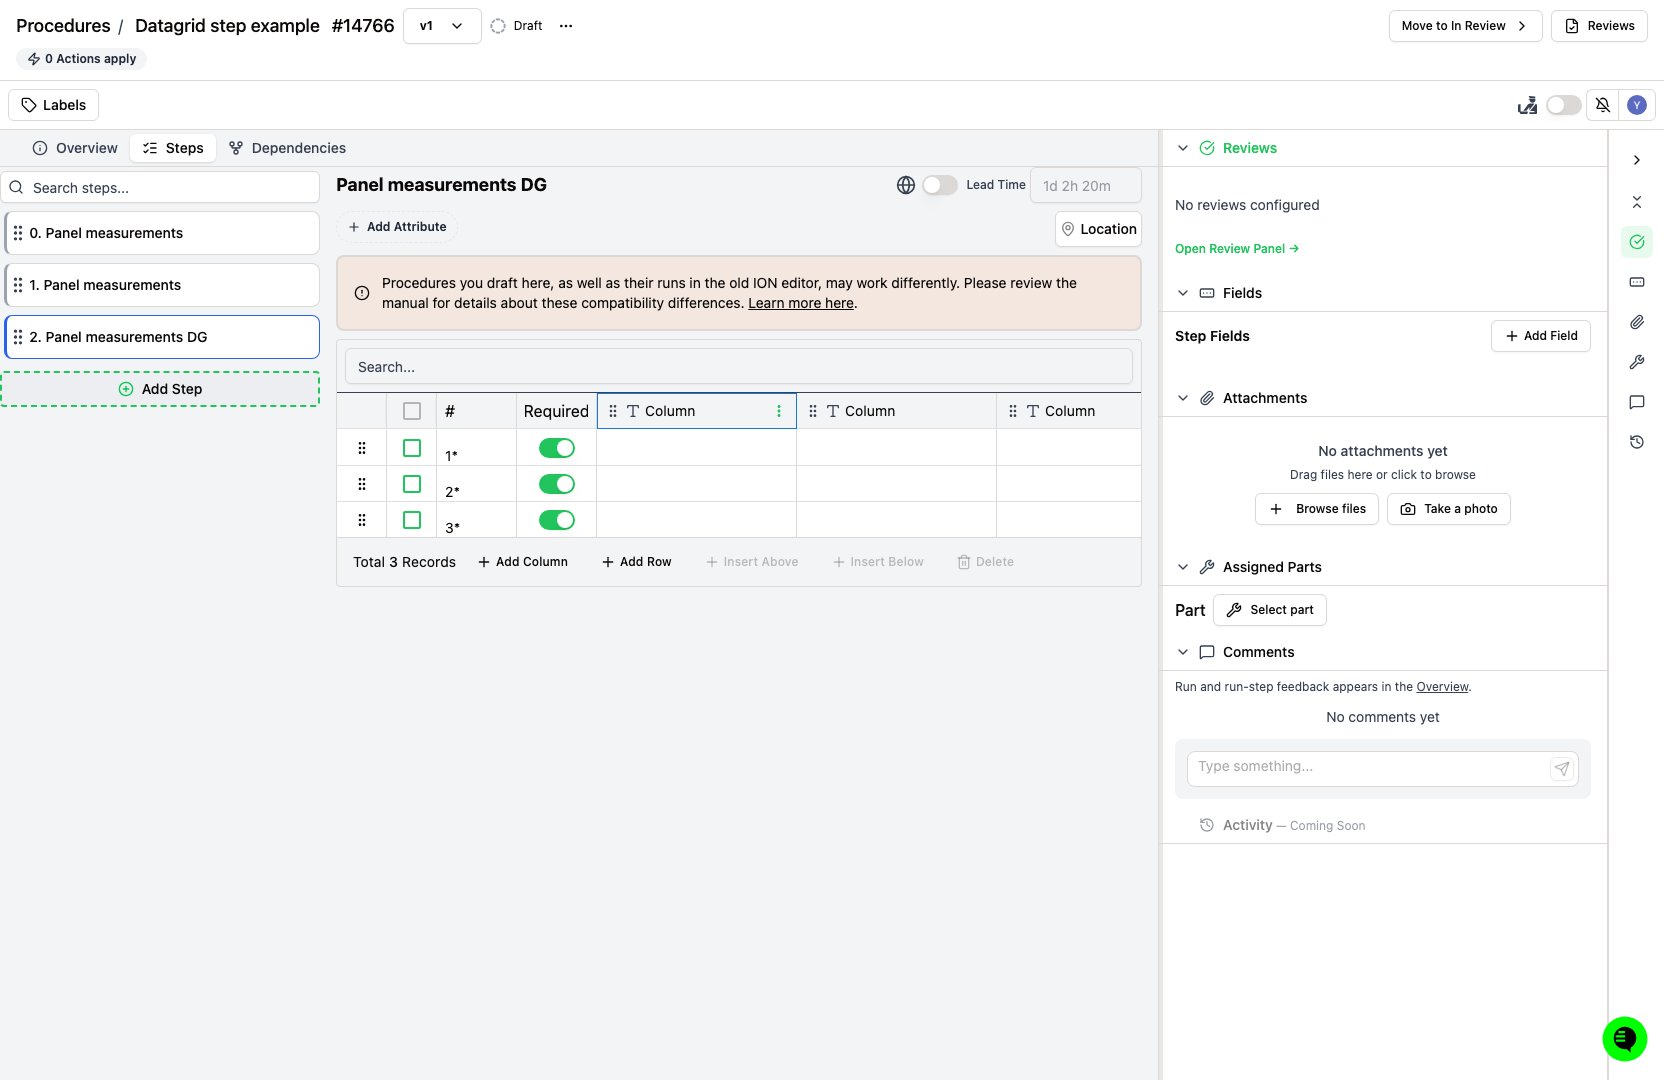
Add fields to a step
Both step types collect operator input through data-collection fields, edited in the Step Fields section for the selected step while the procedure is a draft. For each field type and how number validations behave, see Step field types.- In the Step Fields section, click Add Field.
- Choose the field’s type from the type list, such as Boolean, Number, or Signoff.
- Enter a field name, and optionally a description.
- Set the field’s behavior:
- Turn on Required to block step completion until the field is filled.
- Turn on Allow “Not Applicable” on a required field to let the operator confirm the field doesn’t apply.
- Configure any type-specific settings, such as a signoff role or select options.
Set a step’s lead time
Set a Lead Time on a step to record how long the work should take, entered as a duration such as1d 2h 20m. Step lead times roll up into the procedure’s total. During a run, the step’s time tracking compares logged time against this lead time.
Copy a step
In the Add Step dialog, open the Add Existing Step tab and search by step name in the Search steps… box. Click a result to copy it into the procedure. You can also duplicate a step in place. Hover over a step in the step list, open its … actions menu, and choose Duplicate. To share one step across procedures and revise it in one place instead of copying it, use a standard step.Nest child steps
Create child steps by hovering over a step, opening its … actions menu, and choosing Add child step, or by dragging an existing step under another step.Reorder steps
Drag a step by its handle to reorder the steps.Delete a step
Hover over a step in the step list, open its … actions menu, and choose Delete step. A step that has a dependency can’t be deleted: remove its step dependencies first.Tag a step’s location
Set a step’s location in the Location field, such as “Testing Lab” or “Paint booth 1”.Old ION compatibility
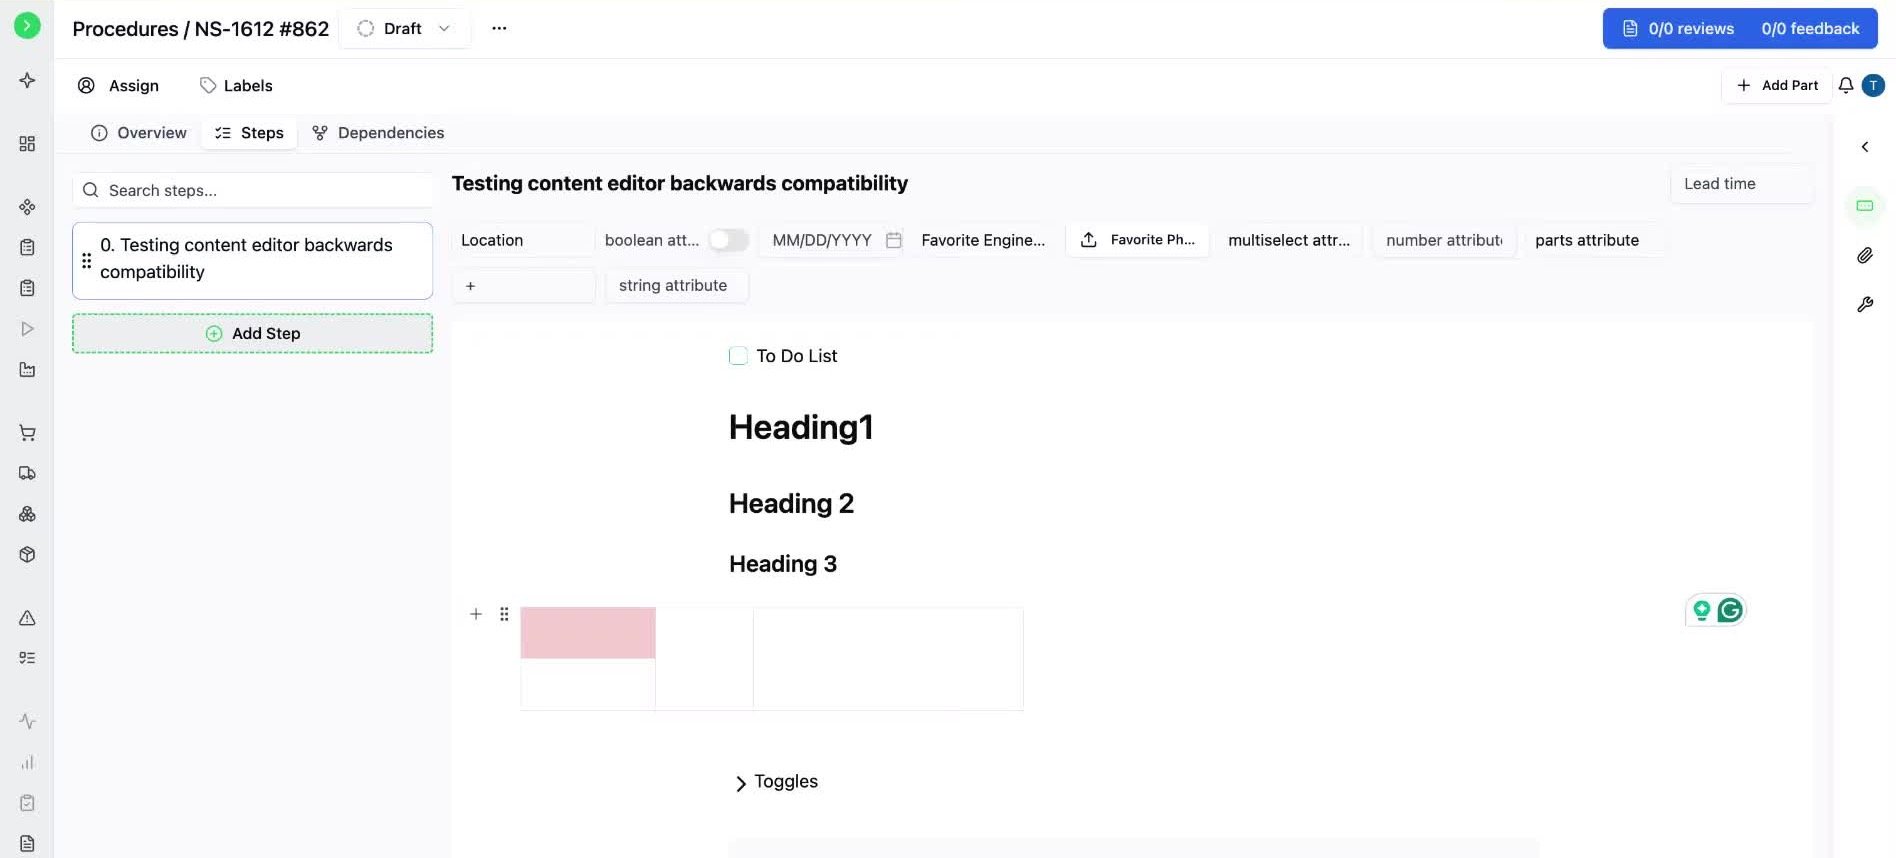
A content step with rich formatting rendered.
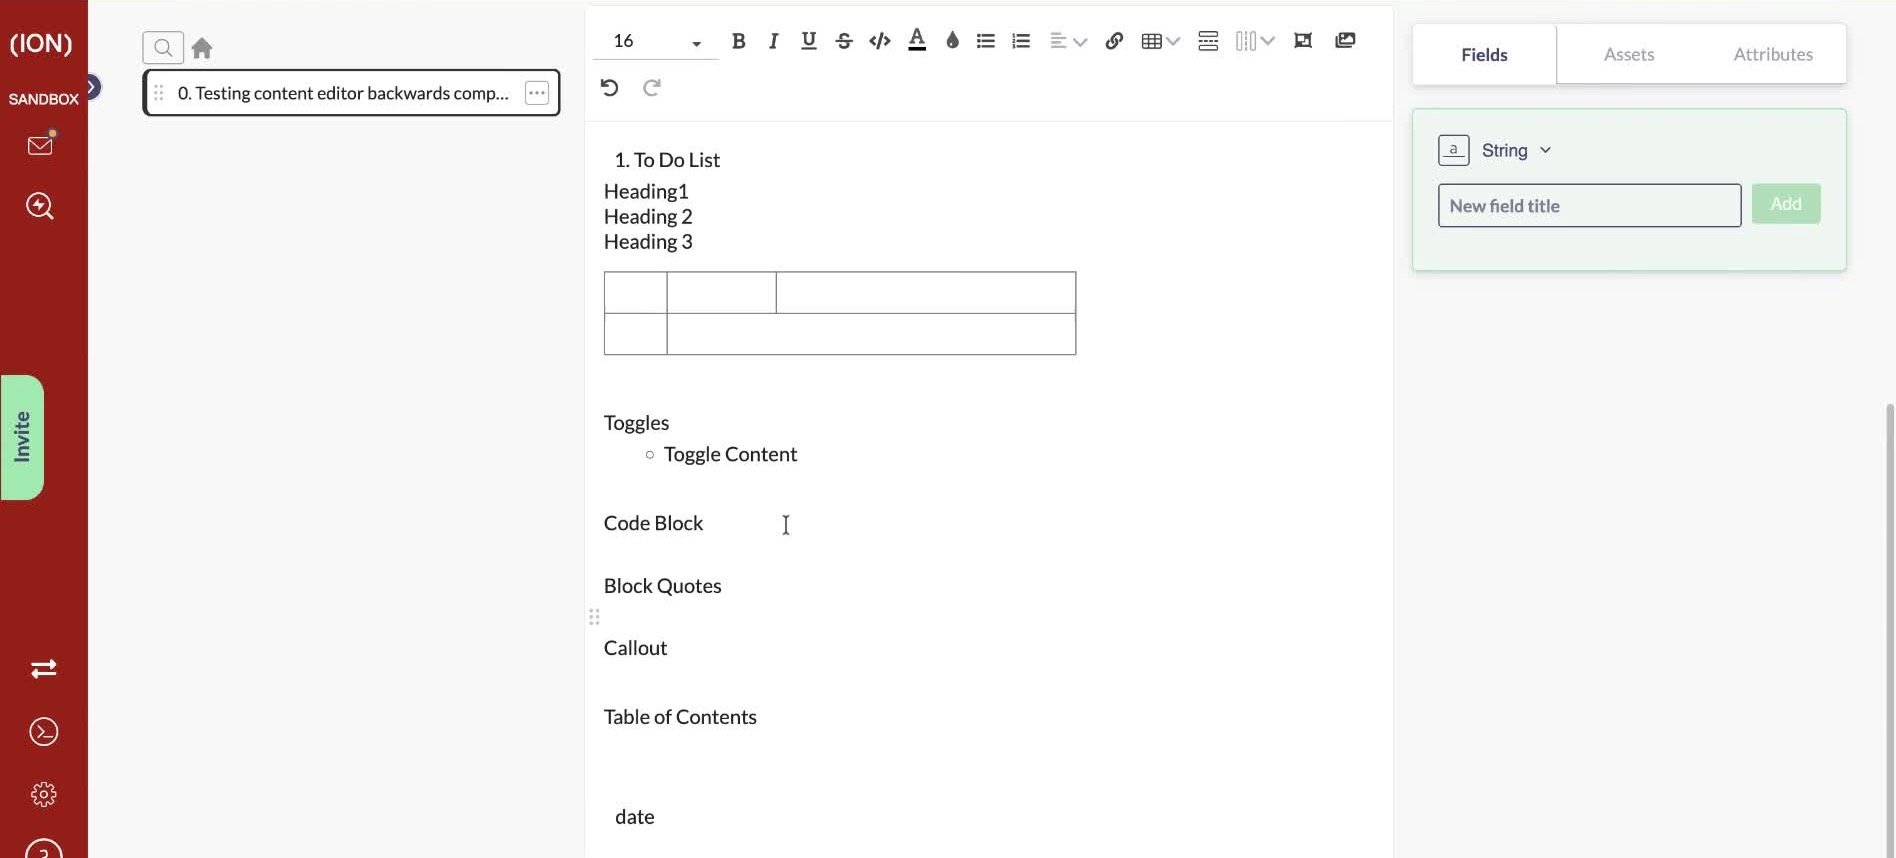
The same content step in Old ION, with the formatting stripped out.